How to Build an Email List: A Beginner’s Guide to Mailchimp/MailerLite


To build an email list, sign up for a free email service provider like MailerLite or Mailchimp, create your first list, then add a signup form to your WordPress site using the provider’s official plugin or a list-building plugin. Offer a genuine reason to subscribe, like a useful checklist or guide, then place the form somewhere visible, at the end of posts and in your sidebar. The whole setup takes under an hour.
Before You Start
Make sure you have the following in place first:
- A clear idea of what you’ll actually send subscribers, tips, new post notifications, or something more specific
- A genuine reason for someone to subscribe (a lead magnet), covered below
- Administrator access to your WordPress dashboard
Search traffic is genuinely valuable, but you don’t own it, an algorithm update can change your visibility overnight. An email list is different. It’s a direct line to people who’ve already shown interest in what you write, and it’s entirely yours, independent of any platform’s rules. Building one doesn’t require a large following to start, it requires a working signup form and a genuine reason to subscribe.
What You’ll Learn
- How to choose an email service provider that fits a beginner’s budget
- How to create your first list and signup form
- Where to place your form for the best realistic results
- What a lead magnet is, and why it matters more than the form itself
Choosing an Email Service Provider
Worth noting upfront: Mailchimp significantly reduced its free plan in early 2026, it now covers only 250 contacts and 500 emails per month, with no automation features. That changes the calculation for a lot of beginners compared to a few years ago.
| Provider | Free Plan | Best For |
|---|---|---|
| MailerLite | Up to 1,000 subscribers, 12,000 emails/month | Most beginners, genuinely generous free tier |
| Mailchimp | 250 contacts, 500 emails/month, no automation | Those who specifically want Mailchimp’s ecosystem or already use it elsewhere |
| Brevo | Generous free tier, contact limits vary by plan | A solid alternative worth comparing before committing |
For most beginners starting today, MailerLite’s free tier is simply more generous than Mailchimp’s current one. That said, if you already have a specific reason to prefer Mailchimp, its smaller free tier is still workable while your list is just getting started.
Step 1: Create Your Account and First List
- Sign up for a free account with your chosen provider.
- Create your first list or “audience,” this is where new subscribers will be stored.
- Fill in basic sender details, your name or site name, and the email address subscribers will see messages come from.
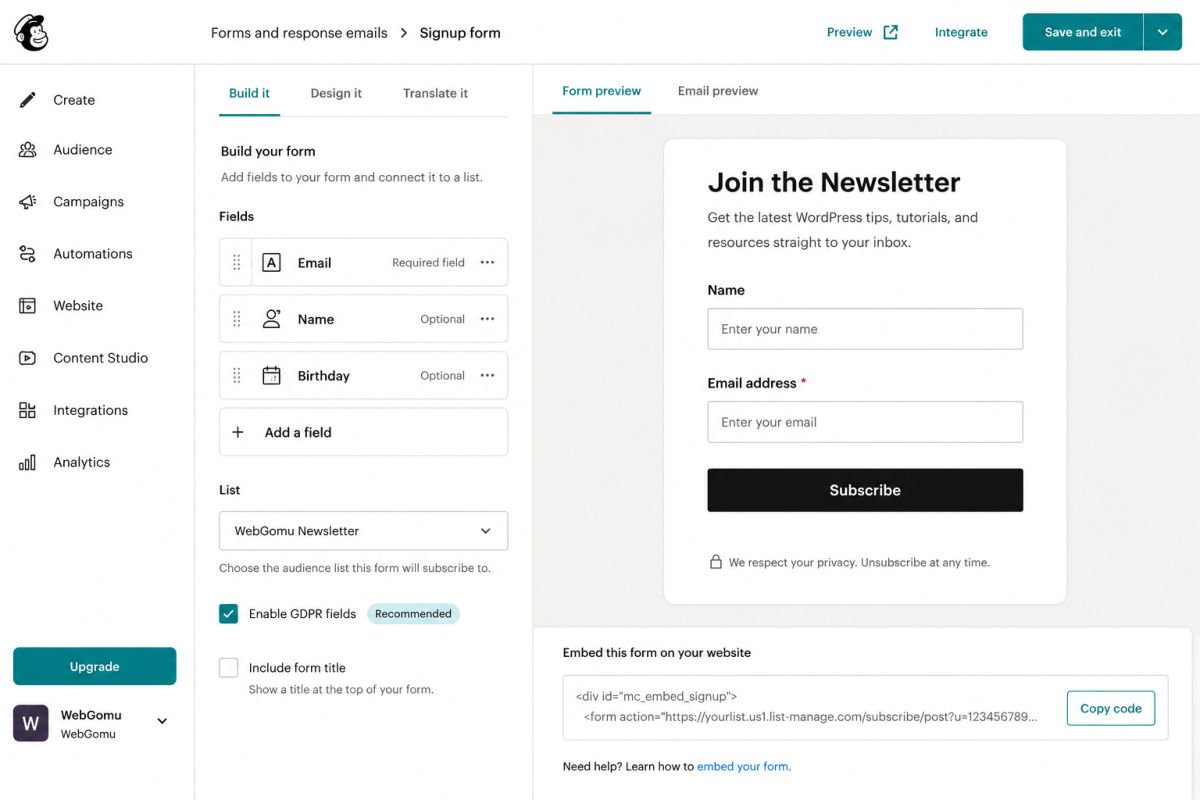
Step 2: Create a Signup Form
Most providers offer two form types:
- Embedded forms — a standard signup box placed directly on a page, sidebar, or at the end of a post
- Pop-up forms — appear based on a trigger like time on page, scroll percentage, or exit intent (when a visitor’s mouse moves toward closing the tab)
Exit-intent pop-ups tend to be the least intrusive option if you want to use a pop-up at all, since they only appear as someone’s about to leave anyway, rather than interrupting active reading.
Step 3: Add the Form to Your WordPress Site
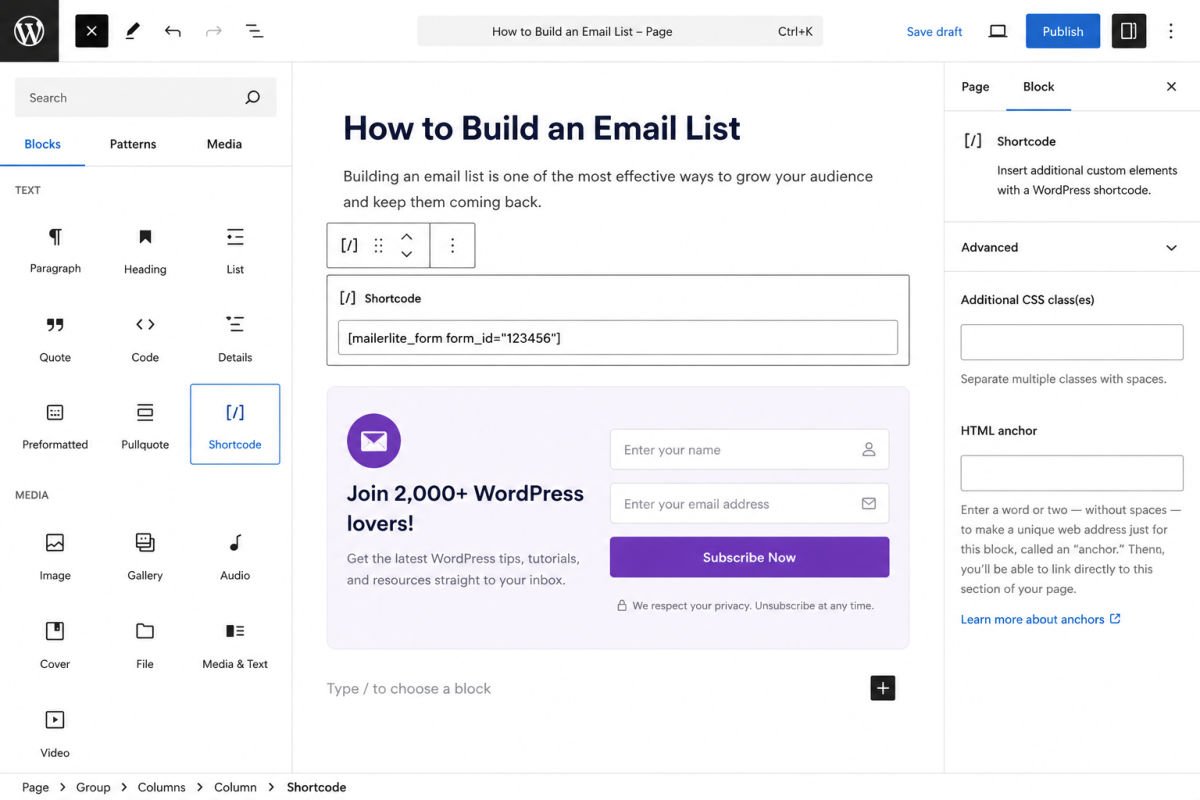
Most major providers, including MailerLite, offer an official WordPress plugin that lets you embed forms using a simple shortcode, no manual code required.
- Go to Plugins → Add New Plugin.
- Search for your provider’s official plugin (e.g., “MailerLite” or “Mailchimp for WordPress”).
- Install and activate it, then connect it to your account using your API key, found in your provider’s account settings.
- Copy the shortcode or embed block for your form, and place it wherever you want it to appear, in a post, a page, or a widget area.
Step 4: Create a Genuine Reason to Subscribe
A blank “Subscribe to our newsletter” box rarely converts well on its own. A lead magnet, something genuinely useful offered in exchange for an email address, performs significantly better. For WebGomu specifically, this might look like a downloadable WordPress launch checklist or a condensed “quick start” guide.
WebGomu Tip: Your lead magnet doesn’t need to be elaborate. A single, genuinely useful checklist or condensed guide, built from content you’ve already written, outperforms an ambitious project you never finish. Start small and specific.
Step 5: Stay Compliant
A few non-negotiable basics: only add people who’ve explicitly opted in themselves, never import or add email addresses without genuine consent, and make sure every email includes a clear, working unsubscribe link. Most email service providers handle the unsubscribe link automatically, but it’s worth confirming it’s present and functional.
Where to Place Your Signup Form
- At the end of blog posts, when a reader has just finished something valuable, that’s a strong moment to ask
- In your sidebar, if your theme has one, for consistent, low-friction visibility
- On a dedicated page, linked from your main navigation
Troubleshooting
My form isn’t showing up on the page
Confirm the shortcode or embed block was pasted correctly, and that the plugin is actually connected to your account with a valid API key.
New subscribers aren’t appearing in my list
Double-check the form is linked to the correct list or audience in your provider’s settings, this is a common setup mismatch, especially if you’ve created more than one list.
My emails are landing in spam
This usually points to sender reputation or authentication settings (SPF/DKIM records) not being fully configured, most providers offer a guided setup for this under their sending domain settings.
Common Mistakes
- Adding a generic subscribe form with no genuine incentive to sign up.
- Choosing Mailchimp by habit without checking whether its current free tier actually fits your needs.
- Placing the signup form somewhere with almost no visibility, like the very bottom of a rarely visited page.
- Importing contacts who never explicitly opted in, a compliance risk, not just a best practice issue.
Recommended Tools
- MailerLite — genuinely generous free tier, a strong default for most beginners in 2026
- Mailchimp — still workable, though its free tier is now considerably more limited than it once was
Key Takeaways
- An email list is a direct, algorithm-independent connection to your audience.
- MailerLite’s free tier is currently more generous than Mailchimp’s for most beginners.
- A genuine lead magnet outperforms a blank “subscribe” box.
- Always require explicit opt-in, and keep unsubscribe links functional.
Frequently Asked Questions
Is MailerLite or Mailchimp better for beginners?
As of 2026, MailerLite’s free plan is significantly more generous, supporting more subscribers and emails at no cost. Mailchimp remains a solid choice if you specifically want its ecosystem or already use it elsewhere.
Do I need a lead magnet to start building a list?
It’s not strictly required, but it meaningfully improves signup rates. Even a simple, genuinely useful checklist tends to outperform a plain “subscribe” prompt.
How do I add a signup form to WordPress without coding?
Most providers, including MailerLite, offer an official WordPress plugin that generates a shortcode or embed block you can place anywhere on your site, no code required.
Can I add people to my list without them signing up themselves?
No, this isn’t compliant practice. Every subscriber needs to explicitly opt in themselves, and every email needs a working unsubscribe option.
Where’s the best place to put a signup form?
The end of blog posts tends to perform well, since readers who just finished valuable content are more likely to want more. A sidebar or dedicated page adds consistent additional visibility.
Resources Links
Author:

Christoper Enolpe
Founder of WebGomu • WordPress Freelancer with 10+ Years of Experience
Christoper is the founder of WebGomu and a WordPress freelancer with over 10 years of hands-on experience building, optimizing, and maintaining WordPress websites. He writes practical, beginner-friendly guides based on real-world experience, covering WordPress, SEO, website performance, and AI tools to help readers build better websites with confidence.
Learn more: https://webgomu.com/about/
Get one WordPress tip every week
Start Here

The Ultimate Beginner’s Guide to WordPress (2026): Build Your First Website Without Coding
Popular Guides
Our Partner

More from the blog
How to Automate Email Newsletters from Your Blog (2026)
Connecting WordPress to Zapier/Make: A Beginner’s Guide (2026)