What to Do After Launching a WordPress Website: A First-Week Checklist

Before You Start
Make sure you have the following in place first:
- Administrator access to your live WordPress site, domain settings, and hosting account.
- A list of the most important pages and actions visitors should be able to complete, such as contacting you, booking, or placing an order.
- A separate staging site or a safe test mode for changes that could affect visitors, especially ecommerce checkout.
- A recent backup or a clear way to create one before making significant changes. See my guide to backing up a WordPress website.
After more than 10 years building, customizing, and maintaining WordPress websites, I’ve learned that a useful launch checklist is not a huge technical audit. It is a careful walk through the site as a visitor, followed by a few checks in WordPress and the tools connected to it.
Launching successfully does not mean Google will send traffic right away. It means the site works on its public domain, visitors can complete the actions you built it for, measurement is in place, and you can spot important problems early. Use the checks below to establish that baseline, then move recurring SEO and maintenance work into a separate routine.
What You’ll Learn
- Which checks to complete on launch day before sharing the site widely
- How to test your main pages, forms, checkout, and mobile experience
- How to confirm search engines can discover your important pages
- What to verify in analytics, backups, security, and performance during the first week
How to Use This Post-Launch Checklist
Work through the checks in order. Fix any issue that blocks a visitor from using the site or completing an important action before spending time on lower-priority polish. Keep a short record of what you tested and what still needs attention.
The article focuses on launch and first-week checks. It does not replace a complete SEO setup or a recurring maintenance plan. For those, see my WordPress SEO checklist and WordPress maintenance checklist.
Launch-Day Website Checks
Complete these first checks before you announce the new site or send visitors to it.
1. Confirm the live domain and HTTPS
- Open the site in a private or incognito window and confirm the final domain loads.
- Check that the address uses
https://and that the browser does not show a security warning. - Try the common versions of your domain—with and without
www, and withhttp—and confirm they redirect to your chosen version. - Click a few internal links and look for pages, images, or buttons that still point to a staging or temporary domain.
- If the website moved from an old domain or URL structure, check that important old pages redirect to their closest relevant new pages.
Use a single preferred version of your site address and keep it consistent in WordPress settings, internal links, analytics, and Search Console. If HTTPS is not working, follow my guide to installing an SSL certificate on WordPress.
2. Test the pages visitors need most
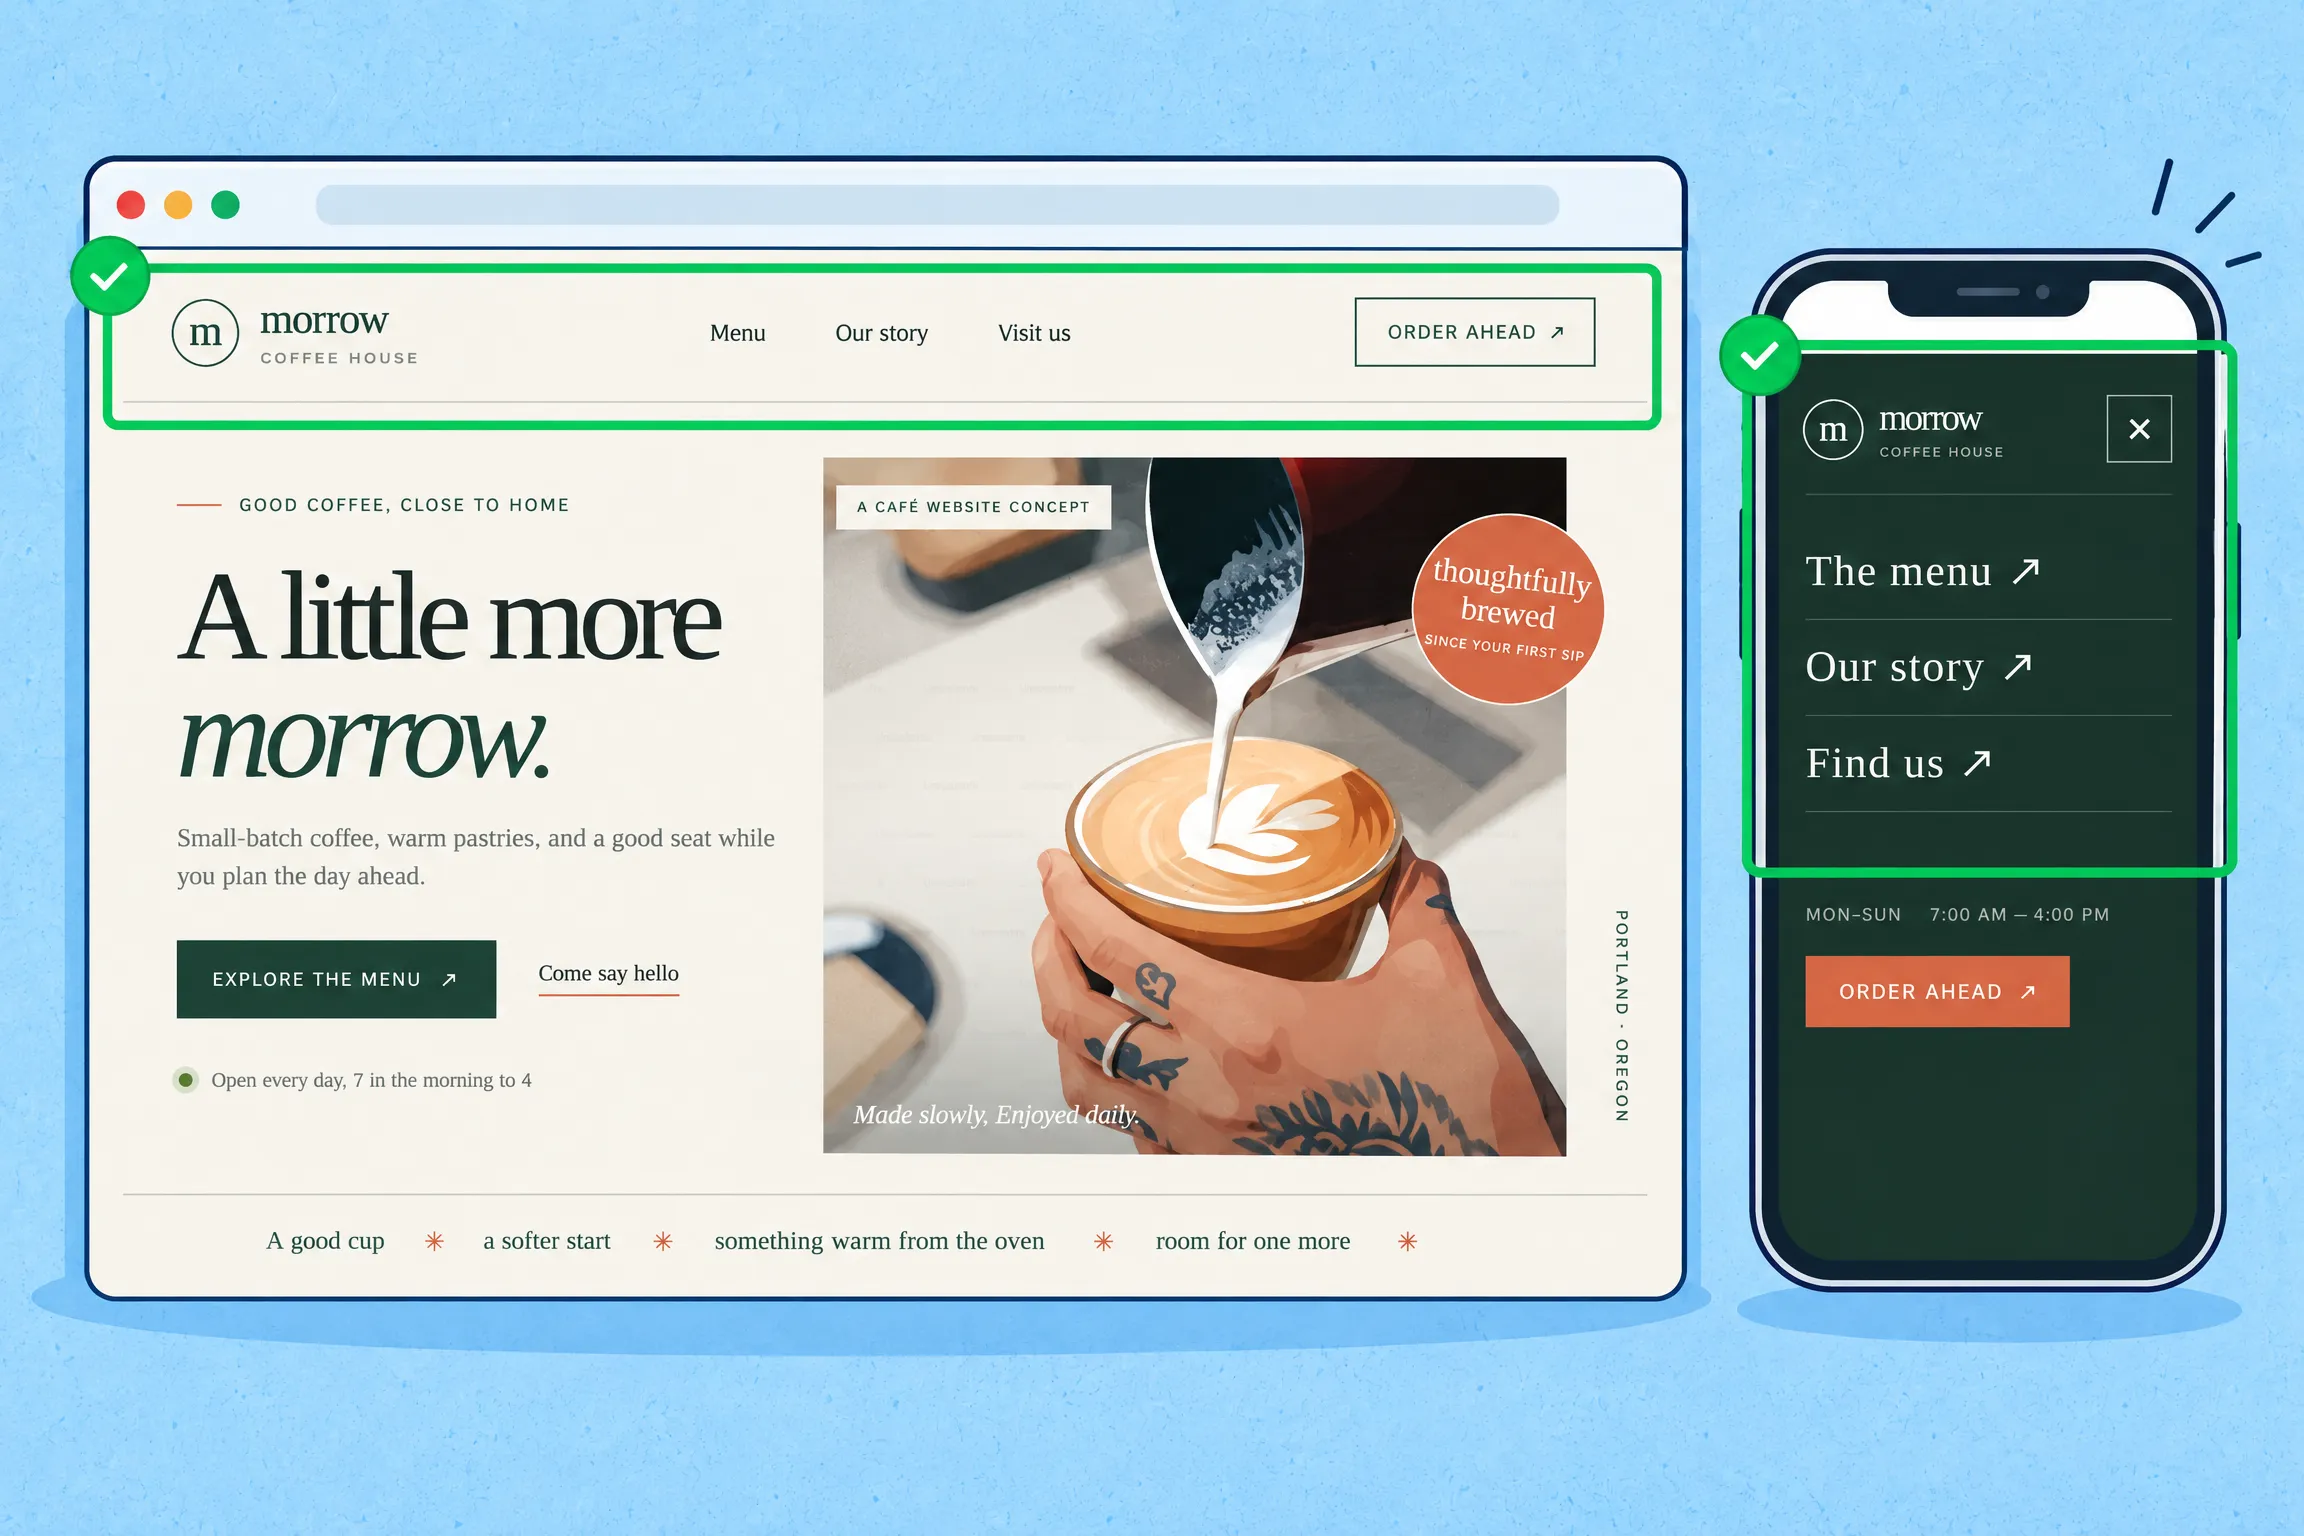
- Visit the homepage, contact page, main service or product pages, and any important landing pages.
- Click the navigation, footer links, buttons, and calls to action rather than only looking at them.
- Check for missing images, broken links, 404 pages, or content that is still marked as a placeholder.
- Open the site on a real phone if possible. Check that menus work, text is readable, and buttons are easy to tap.
A page can look correct in the WordPress editor and still behave differently on the public site. Test it as a visitor who does not have an administrator session or cached page open.
3. Submit every important form or transaction
- Send a test entry through contact, newsletter, quote, booking, and lead forms.
- Confirm that each success message appears and that the submission reaches the intended inbox or CRM.
- Check the spam folder and test any automatic confirmation email sent to the visitor.
- For a store, test checkout using the payment provider’s test mode or another safe test method. Check the cart, shipping and tax display, confirmation email, and order status.
Do not make a real charge just to test checkout unless you intend to complete and refund that transaction. A form that looks fine but fails to send is easy to miss if you never submit it yourself. See my guide to creating a contact form in WordPress if you need help setting one up.
4. Remove accidental blocks to search indexing
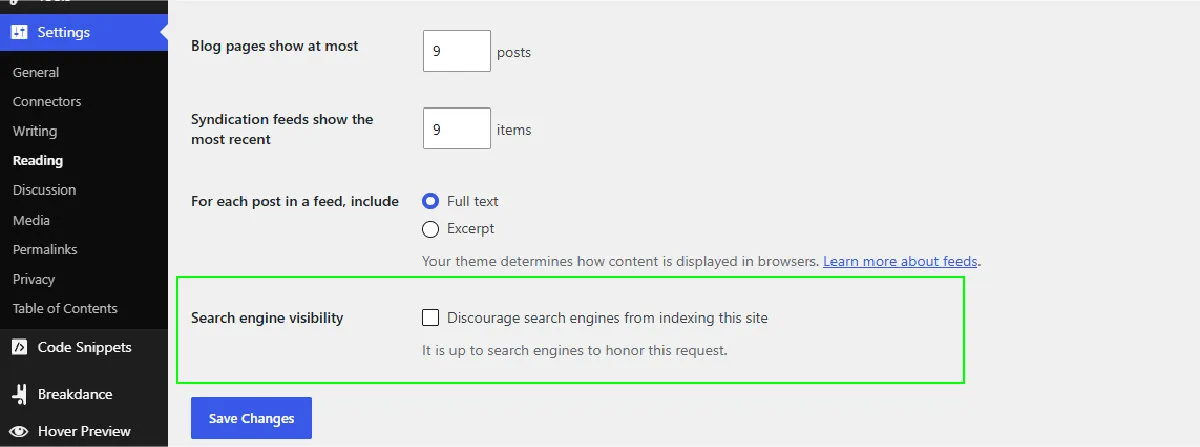
- In WordPress, go to Settings → Reading and confirm “Discourage search engines from indexing this site” is unchecked.
- Check your SEO plugin’s page settings for accidental
noindexdirectives on important public pages. - Confirm that the pages you want to appear in search are public and that the sitemap lists the preferred versions of those URLs.
- Keep private, thank-you, and utility pages out of search where appropriate; do not remove a deliberate
noindexsetting without checking why it is there.
This is a check for accidental blocks, not a promise that Google will index every page. For broader SEO setup and on-page checks, use the WordPress SEO checklist.
First-Week Website Checks
Once the important visitor journeys work, connect your measurement and monitoring tools. These checks help you understand whether the site is reachable and whether the basic data is coming through.
5. Connect Search Console and submit your sitemap
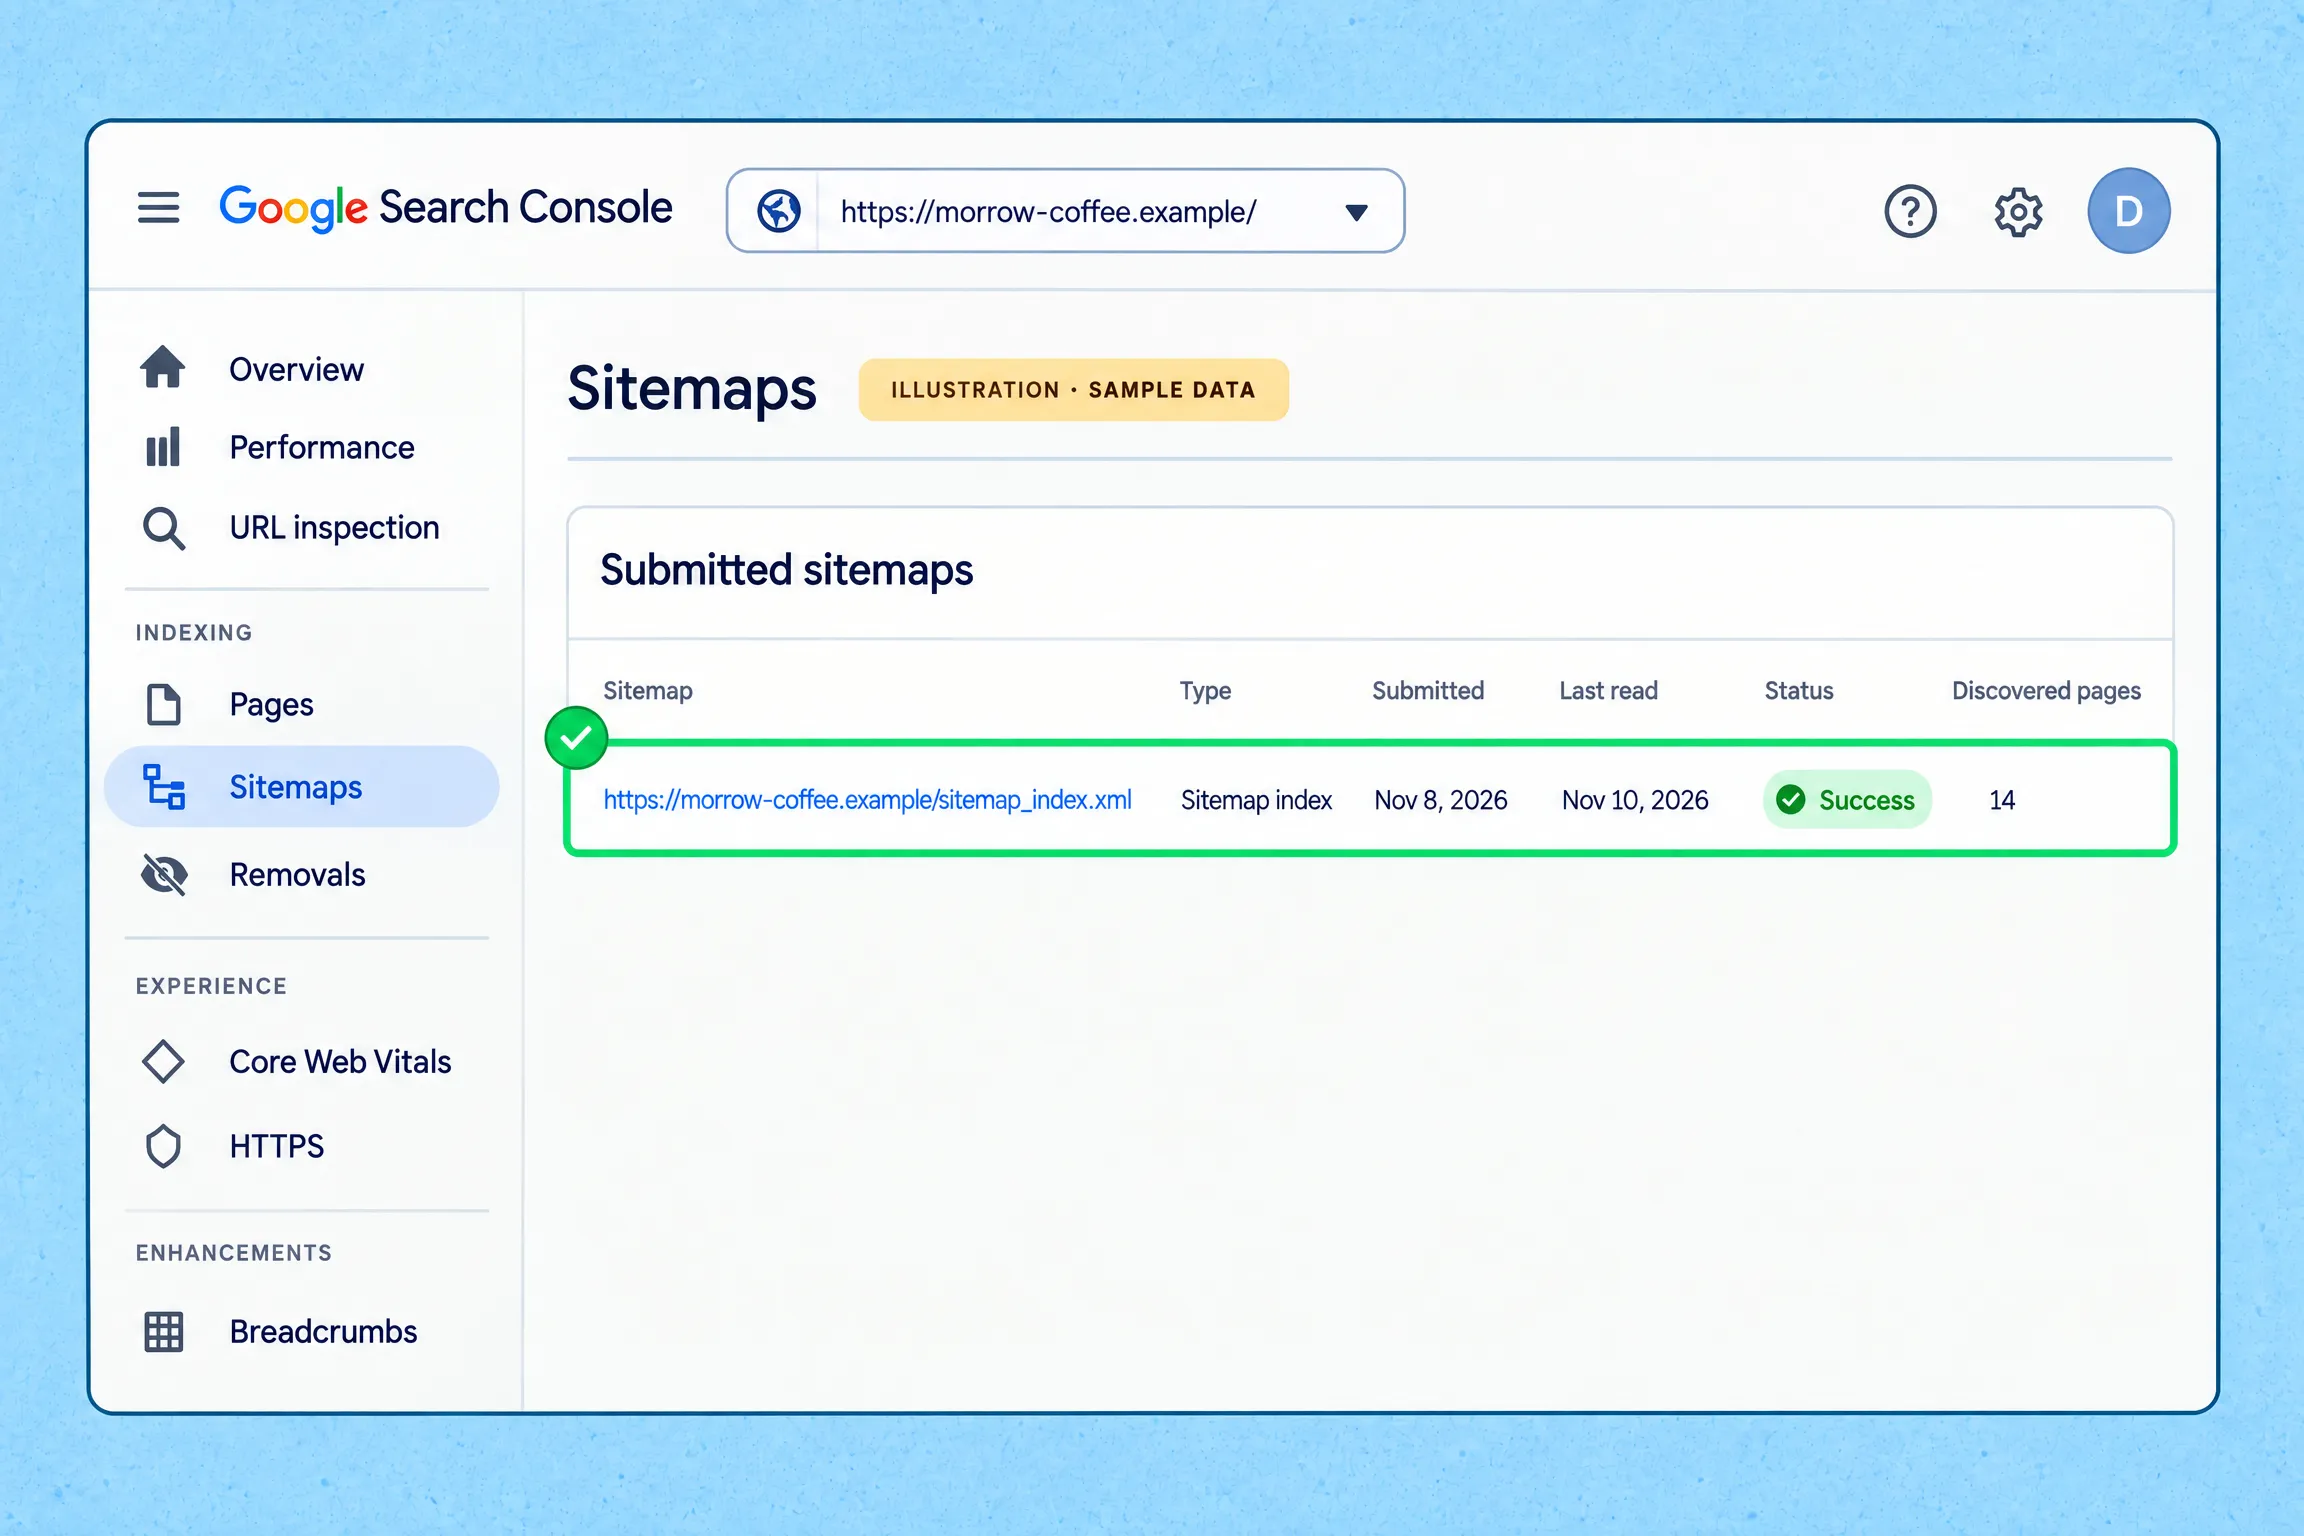
- Verify the correct live website property in Google Search Console.
- Find the sitemap generated by your WordPress SEO plugin. A sitemap index is often at
https://yourdomain.com/sitemap_index.xml, but check the address on your own site. - Submit the sitemap in Search Console and review the Sitemaps report for processing errors.
- Use URL Inspection to test the homepage and a few important pages if you want to check whether Google can access them.
A sitemap helps Google discover URLs, but submission does not guarantee crawling or indexing. Google says crawling can take days to weeks, and requesting a crawl does not guarantee that a page will appear in search. Do not repeatedly request indexing for the same URL in the hope of speeding it up. Follow my step-by-step guide to setting up Google Search Console for WordPress.
6. Verify that analytics is recording visits
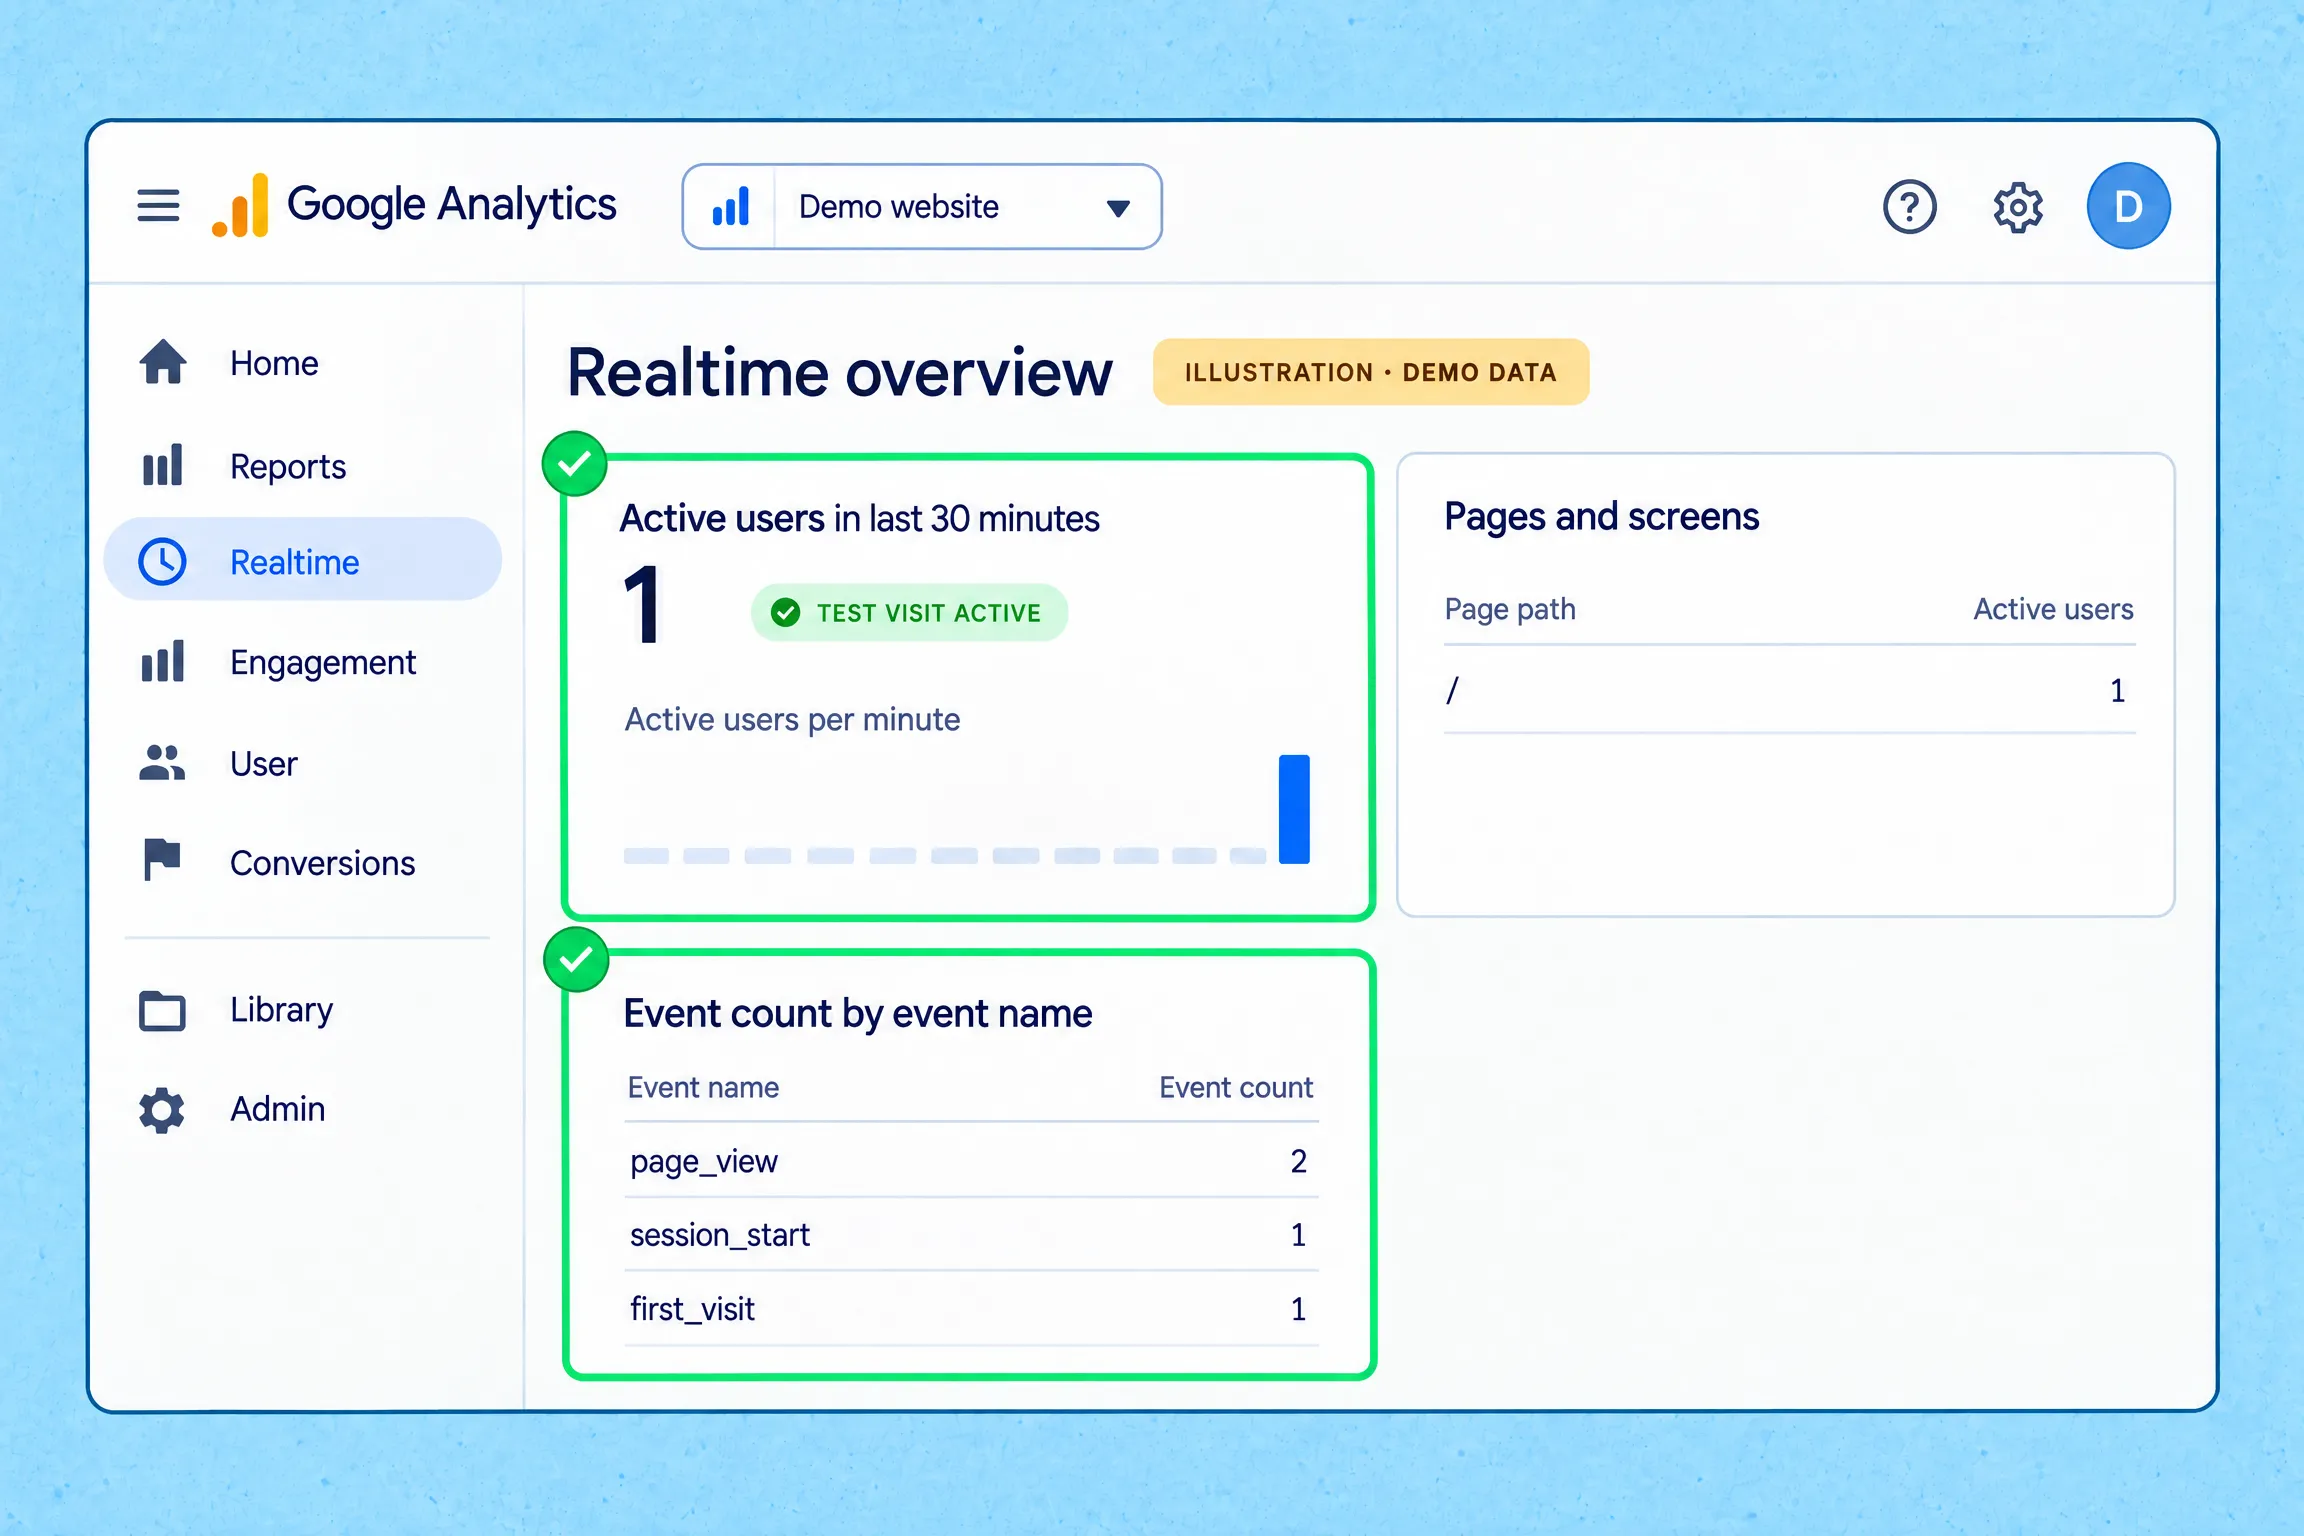
- Open your analytics tool and confirm it is connected to the live website, not a staging domain.
- If you use Google Analytics 4, open the Realtime report and visit the site in another browser or private window.
- Test important events, such as form submissions or purchases, if you have configured them.
- Check that the same tracking code has not been installed through multiple plugins or methods, which can lead to duplicate measurement.
- Confirm that analytics and your consent banner behave according to the privacy choices you have configured for visitors.
The first visit test is a basic check that data is arriving; it does not confirm that every event or report is configured correctly. My guide to installing Google Analytics 4 on WordPress walks through setup and verification.
7. Check performance on key pages
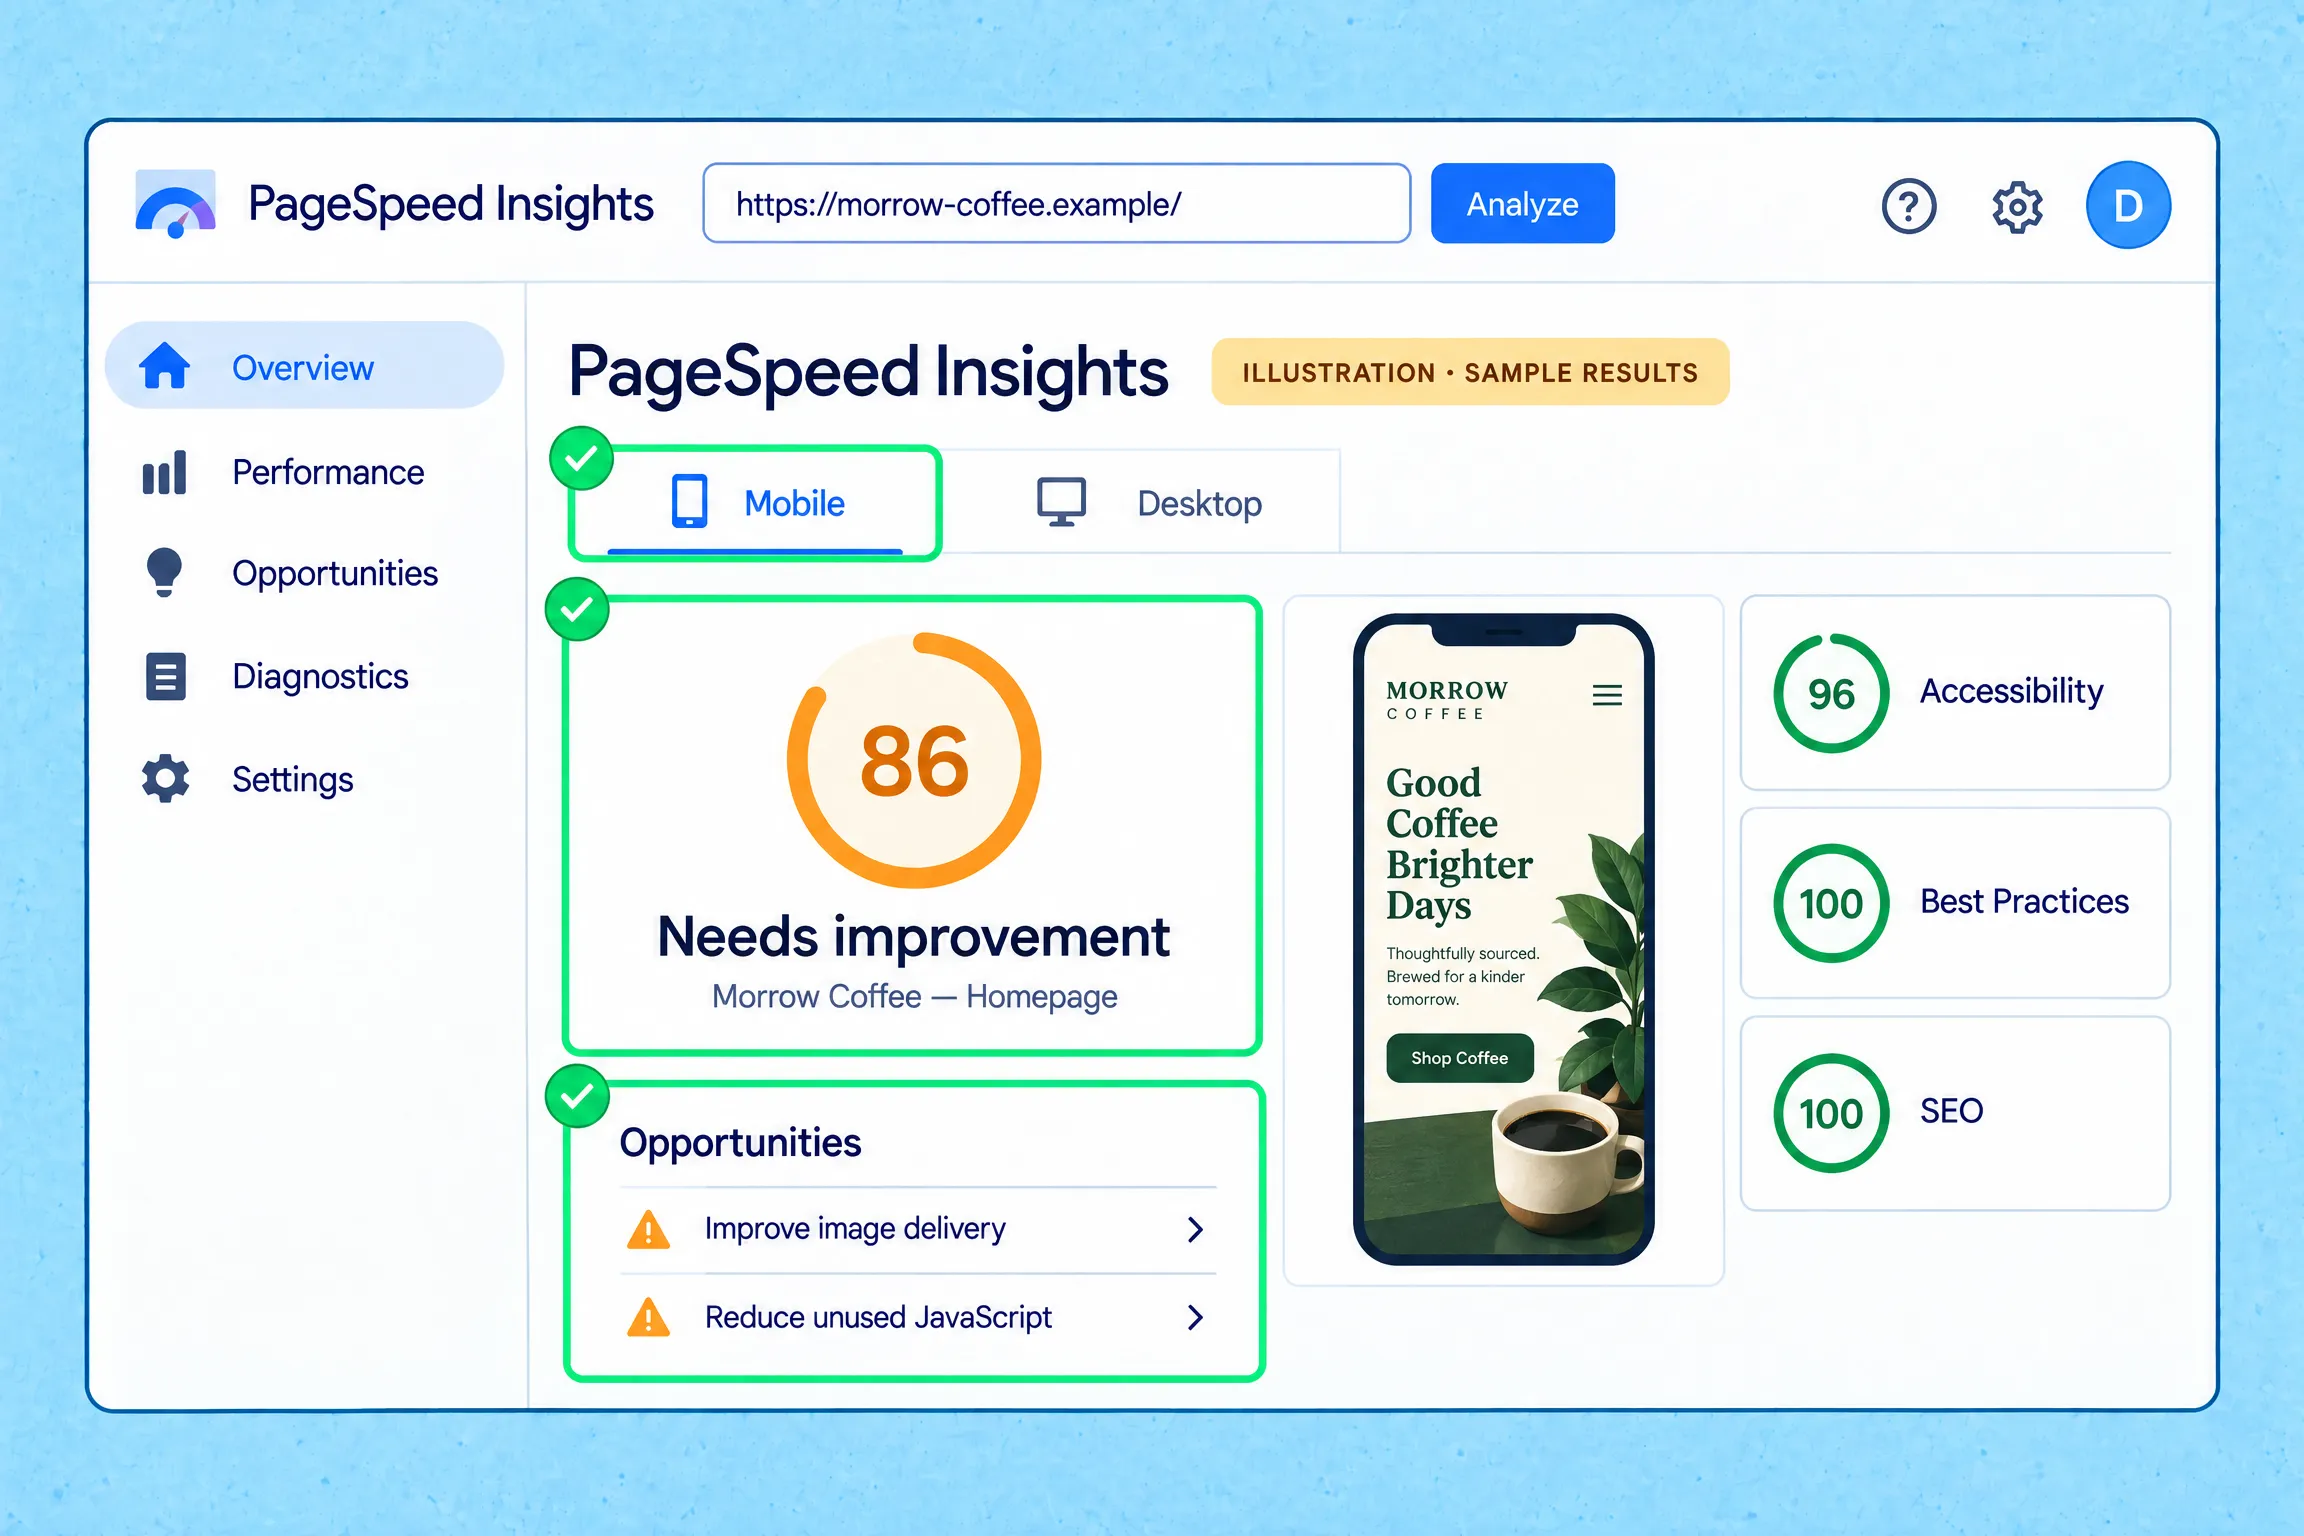
- Run your homepage and one or two important landing pages through PageSpeed Insights.
- Check the real mobile experience too. See whether the main content appears promptly, images display at the right size, and the layout stays stable as the page loads.
- Fix obvious issues first, such as oversized images, a very slow hero section, or a menu that becomes usable only after a long delay.
Treat a performance report as a diagnostic, not a pass-or-fail grade for your whole website. Google’s Core Web Vitals measure loading performance, responsiveness, and visual stability; improving a single score does not replace making the site useful and easy to use. Start with my WordPress speed optimization guide if key pages feel slow.
8. Confirm that a recent backup exists
- Check that a backup has completed successfully and that you know how to access it.
- When possible, keep a backup copy somewhere separate from the website’s hosting account.
- Take a fresh backup before making significant changes after launch.
- Find out how to test a restore safely on staging or with your host; do not experiment on the live site.
A backup is only useful if you can access it when something goes wrong. See my guide to backing up a WordPress website for setup details.
9. Review administrator access and launch leftovers
- Use strong, unique passwords for administrator accounts and enable two-factor authentication where available.
- Remove temporary user accounts that no longer need access.
- Delete plugins or themes installed only for testing and not needed on the live site.
- Keep the software you rely on updated, and make sure you have a backup before significant updates.
For a fuller security routine, follow my guide to WordPress security basics. Security and updates continue after launch; they are not one-time tasks.
10. Assign alerts and review early problems
- Confirm that important site emails go to the right person, including form submissions and order notifications.
- Enable uptime or backup alerts if your host or monitoring tool offers them.
- During the first week, check for Search Console sitemap or indexing errors and confirm analytics data is arriving.
- Keep a short issue log with the problem, affected page, and action taken so you can follow up.
Do not draw big conclusions from a few days of traffic. A newly launched site may not have much search data yet, and early visibility is not a useful measure of whether every launch task was completed correctly.
What to Review After the First Week
After the launch checks, move recurring work onto a schedule instead of treating every task as an emergency. Review your site’s SEO and performance over time, and test important user journeys periodically. My WordPress maintenance checklist covers monthly and quarterly upkeep, including backups, forms, security, site speed, and content updates.
Common Post-Launch Mistakes
- Sharing the site widely before testing forms, email delivery, checkout, and mobile navigation.
- Leaving the WordPress search-engine visibility setting enabled after development.
- Assuming that submitting a sitemap means Google has indexed every page.
- Installing the same analytics tag through more than one method and collecting duplicate data.
- Testing a payment flow by making a real charge unnecessarily.
- Making several major changes at once without a backup or a record of what changed.
- Expecting search traffic or rankings immediately after launch.
- Treating launch checks as a replacement for regular security and maintenance.
Recommended Tools
- Google Search Console: Verify a property, submit a sitemap, inspect URLs, and review search or indexing issues.
- Google Analytics 4: Confirm that visits are recorded and measure configured events. My GA4 setup guide shows how to connect it to WordPress.
- PageSpeed Insights: Review loading, responsiveness, and visual stability for selected pages.
- Your host’s backup and uptime tools: Confirm that backups complete and find out how to receive service alerts.
- A real phone and browser: Test what visitors actually see instead of relying only on the editor preview.
You do not need to install a new plugin for every check. Start with the tools you already use, and add another only when it solves a clear problem.
Key Takeaways
- Start by checking the public domain, HTTPS, key pages, forms, and mobile experience.
- Make sure search engines are not accidentally blocked, then connect Search Console and submit the correct sitemap.
- Test analytics, performance, backups, and administrator access during the first week.
- A sitemap or indexing request does not guarantee that Google will crawl, index, or rank a page.
- Move recurring updates, security checks, and deeper SEO work into a maintenance routine after launch.
WebGomu Tip: Do one final test as a visitor who is not logged in: open the site on your phone, submit the main form, and confirm the response arrives. That short walkthrough catches problems that are easy to miss while working inside WordPress.
Frequently Asked Questions
What should I do immediately after launching a website?
Confirm that the live domain and HTTPS work, test important pages and forms, check the site on a phone, and make sure search engines are not accidentally blocked. Then verify analytics, submit your sitemap in Search Console, and confirm that a recent backup exists.
How long does it take Google to index a new website?
There is no fixed timeline. Google says crawling can take days to weeks, and submitting a sitemap or requesting indexing does not guarantee that a page will appear in search. Use Search Console to monitor discovery and indexing instead of expecting immediate visibility.
Should I submit my sitemap after launch?
Yes. Verify the correct website in Google Search Console and submit the sitemap generated by your CMS or SEO plugin. A sitemap helps Google discover URLs, but it is a hint rather than a guarantee of crawling or indexing.
How can I test if my website is working properly?
Open the public site in a private browser window, visit key pages on desktop and mobile, click the main navigation and calls to action, submit every important form, and safely test checkout if you run a store. Confirm that messages and order notifications reach the right place.
Do I need Google Analytics before launching?
It is best to have analytics installed and tested as early as possible so you do not miss useful activity. If the site is already live, connect it now and confirm that visits appear in the reporting tool’s Realtime view. Check that tracking is not duplicated and that your consent settings are configured appropriately.
What should I check during the first week after launch?
Confirm that Search Console processed the sitemap, analytics is receiving data, important forms and emails still work, and no critical performance or indexing errors have appeared. Avoid making decisions from a few days of traffic data alone.
Resources Links
- The Complete WordPress SEO Checklist
- WordPress Maintenance Checklist: Monthly and Quarterly Tasks
- How to Set Up Google Search Console for WordPress
- How to Install Google Analytics 4 on WordPress
- How to Back Up Your WordPress Website
- How to Install an SSL Certificate on WordPress
- Google Search Central: Build and Submit a Sitemap
- Google Search Central: Ask Google to Recrawl Your URLs
- Google Search Central: Core Web Vitals
Author:

Christoper Enolpe
Founder of WebGomu • WordPress Freelancer with 10+ Years of Experience
Christoper is the founder of WebGomu and a WordPress freelancer with over 10 years of hands-on experience building, optimizing, and maintaining WordPress websites. He writes practical, beginner-friendly guides based on real-world experience, covering WordPress, SEO, website performance, and AI tools to help readers build better websites with confidence.
Learn more: https://webgomu.com/about/
Get one WordPress tip every week
Start Here
The Ultimate Beginner’s Guide to WordPress (2026): Build Your First Website Without Coding
Popular Guides
Our Partner

More from the blog
How to Debug and Fix WordPress Critical Errors Safely (Without Crashing Live Sites)
Essential PHP Snippets to Remove WordPress Bloat and Improve Speed